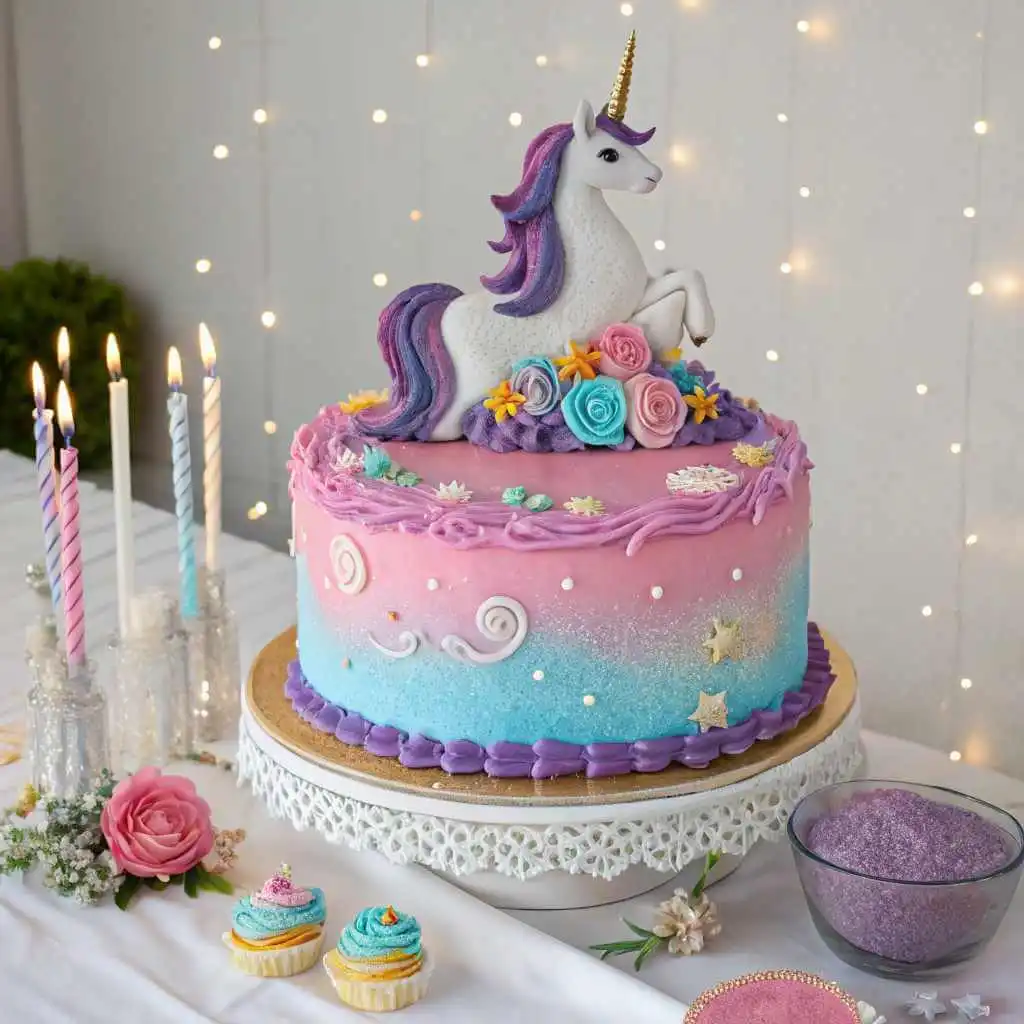
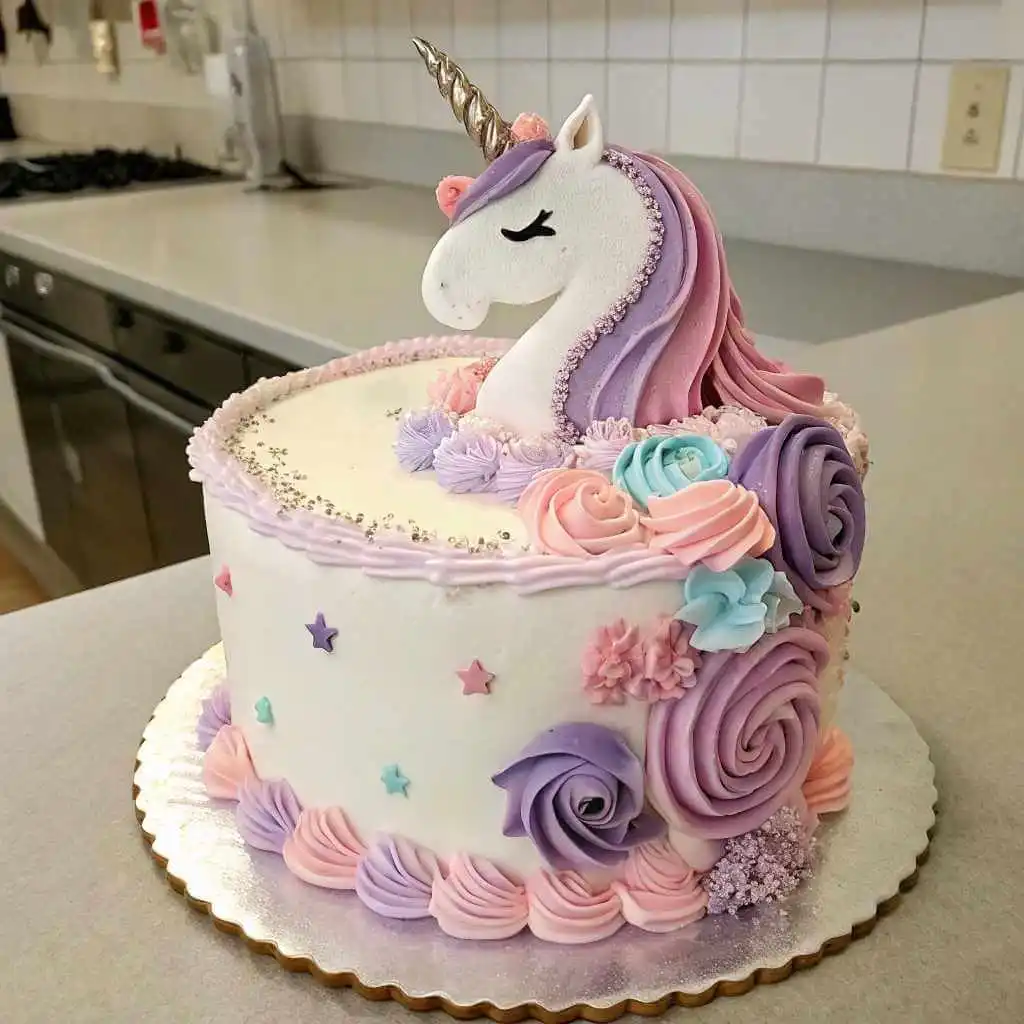
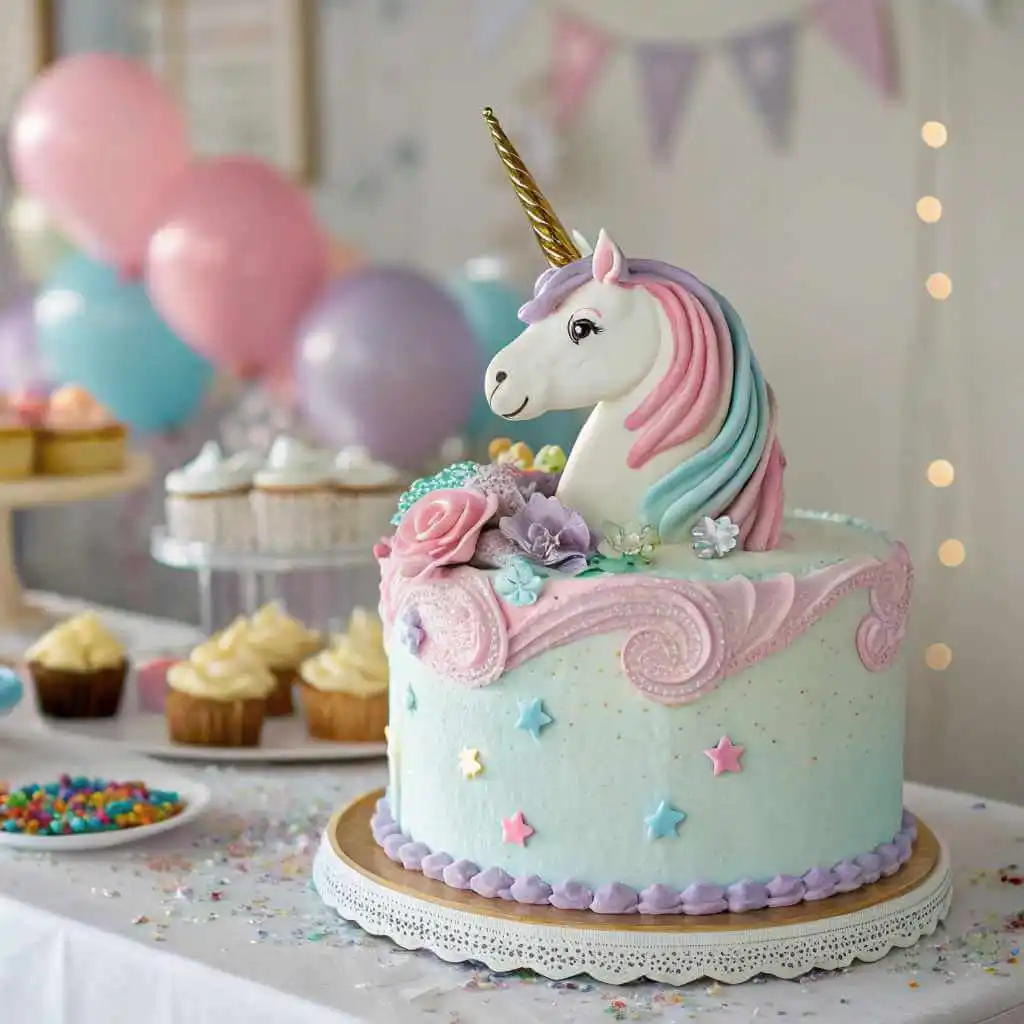
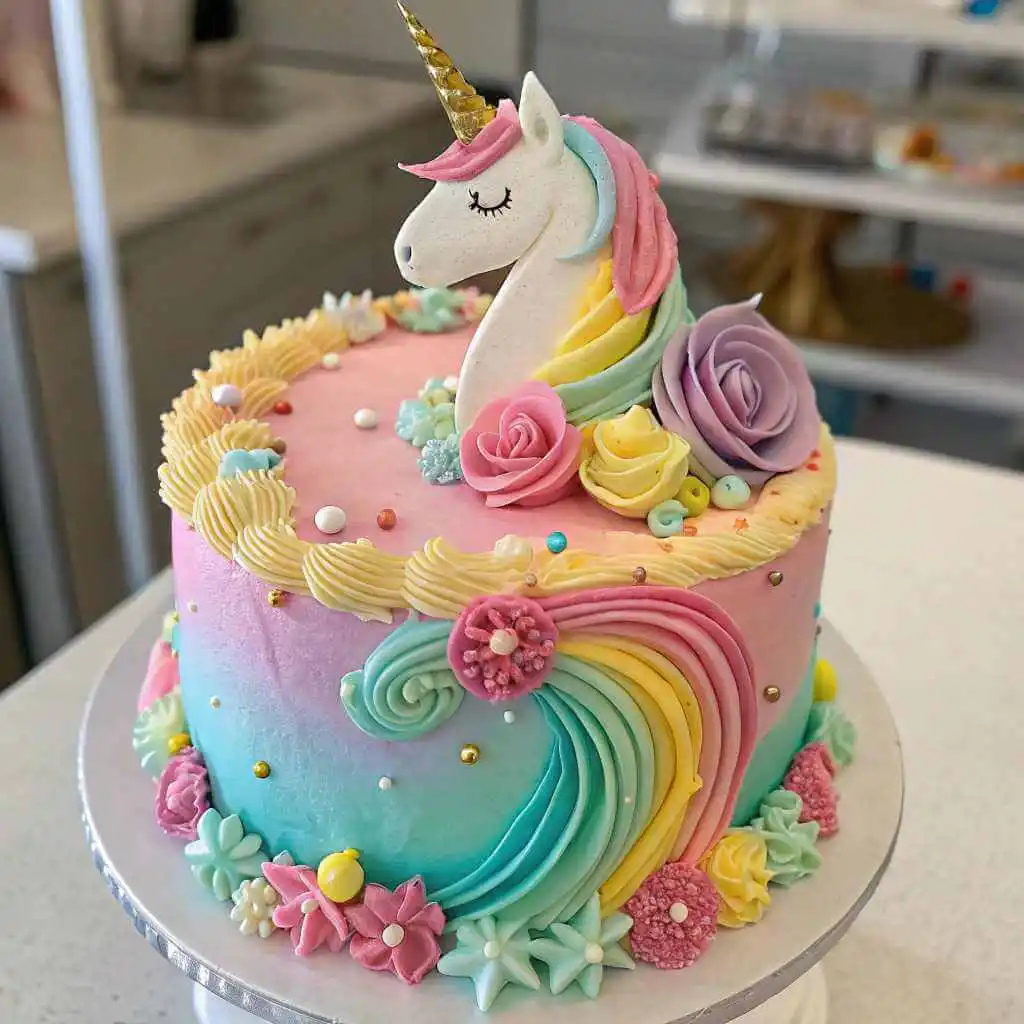
Unicorn cake have taken the world by storm, becoming a must-have centerpiece for birthday parties and celebrations. With their vibrant colors, whimsical designs, and magical charm, these cakes bring a touch of fantasy to any event. Whether you’re planning a child’s birthday bash or a themed party for adults, a unicorn cake is guaranteed to wow your guests and create unforgettable memories. In this tutorial, we’ll guide you through the process of creating a stunning birthday unicorn cake that’s not only visually spectacular but also delicious. Let’s dive into the world of magical baking and make your party truly enchanting!
Key Takeaways
- Learn professional cake decorating techniques
- Transform an ordinary cake into a magical centerpiece
- Develop skills in fondant and buttercream design
- Create a memorable birthday experience
- Master unicorn-themed cake decoration
Essential Tools and Ingredients for Your Magical Unicorn Cake

Making a stunning diy unicorn cake needs careful planning and the right tools. Whether you’re new to baking or have experience, the right tools and ingredients are key to success.
Must-Have Decorating Tools
Start your unicorn cake decorating journey by gathering these essential tools:
- Offset spatula for smooth frosting application
- Piping bags and multiple tips
- Rotating cake stand
- Bench scraper for clean edges
- Food-safe paintbrushes for detailed work
Basic Cake Ingredients List
| Category | Ingredients | Recommended Quantity |
| Dry Ingredients | All-purpose flour, sugar, baking powder | 3 cups total |
| Wet Ingredients | Eggs, butter, vanilla extract, milk | 1.5 cups total |
| Decorative Ingredients | Gel food coloring, edible glitter | As needed |
Special Decorative Elements
For cake decorating tips that make your unicorn cake special, consider these magical touches:
- Fondant for creating horns and ears
- Pastel-colored buttercream
- Edible pearl sprinkles
- Metallic food paint
Pro tip: Always use gel food coloring for vibrant, concentrated colors that won’t thin your buttercream.
With these tools and ingredients, you’re ready for a magical baking experience. It will turn an ordinary cake into a magical unicorn masterpiece.
Planning Your Unicorn Cake Design
Making a stunning unicorn cake needs careful planning and creativity. Your cake design starts with imagination and smart thinking. Think of your cake as a canvas where magic comes together to create a memorable centerpiece.
Before you start decorating, remember these important tips for your unicorn cake:
- Sketch your initial design concept
- Select a color palette that matches the party theme
- Determine the cake’s overall size and complexity
- Choose complementary decorative elements
Looking for inspiration is key in designing fantasy cakes. Check out Pinterest and Instagram for unique unicorn cake ideas. Find elements that spark your creativity – like pastel colors, shimmering textures, or detailed horn designs.
“A thoughtfully designed cake can elevate a simple dessert into an exceptional masterpiece.”
Your cake’s personality comes from thoughtful details. Think about the birthday person’s age, interests, and favorite colors. Kids might love bright, fun designs, while adults might prefer elegant unicorn themes.
Pro tip: Make a mood board with colors, textures, and design ideas before starting your cake. This visual guide will help you stay focused and create a magical design.
Baking the Perfect Base Cake Layers

Making a stunning homemade unicorn cake begins with baking perfect cake layers. The base of your birthday cake decoration relies on precise baking techniques. These ensure a delicious and visually appealing result.
Mixing the Batter Correctly
The secret to an amazing unicorn cake recipe starts with the batter. Follow these essential mixing tips:
- Use room temperature ingredients for smoother blending
- Cream butter and sugar until light and fluffy
- Sift dry ingredients to prevent lumps
- Mix wet and dry ingredients gradually to maintain batter consistency
Achieving Perfectly Even Cake Layers
Evenly layered cakes are essential for achieving a polished, professional-looking unicorn cake. Use these techniques for even baking:
- Measure batter precisely using a kitchen scale
- Use cake strips around pan edges for even heat distribution
- Tap cake pans gently to remove air bubbles
- Rotate pans midway through baking
Cooling and Leveling Techniques
Proper cooling makes your cake extraordinary:
| Cooling Stage | Recommended Time | Key Tips |
| In-Pan Cooling | 10-15 minutes | Let cake rest in pan to set structure |
| Rack Cooling | 1-2 hours | Allow complete air circulation |
| Leveling | After complete cooling | Use serrated knife or cake leveler |
“A flawlessly baked cake layer serves as the foundation for your unicorn cake masterpiece.” – Professional Baker’s Advice
Mastering these baking techniques will help you create a solid foundation for your magical unicorn cake. It will impress guests and make your birthday celebration unforgettable.
Creating the Perfect Buttercream Consistency
Mastering buttercream is key for your homemade unicorn cake. The right consistency makes your birthday cake decoration stand out. Professional tips start with creating smooth, workable buttercream that holds its shape.
When making buttercream for your unicorn cake, temperature and ingredient ratios matter. Use room-temperature butter for the smoothest texture. Aim for a consistency that’s firm for piping but soft for spreading.
- Use unsalted butter for better control of sweetness
- Sift powdered sugar to prevent lumps
- Add liquid ingredients gradually
- Mix on low speed to avoid air bubbles
Different decorating techniques need different buttercream consistencies. Here’s a handy guide to assist you with adjustments:
| Technique | Buttercream Consistency | Mixing Tips |
| Piping Borders | Stiff | Chill slightly before using |
| Smooth Frosting | Medium | Room temperature works best |
| Filling Layers | Soft | Add extra liquid if needed |
“The secret to beautiful cake decorating is patience and practice.” – Professional Pastry Chef
For vibrant unicorn cake colors, use gel food coloring. It gives intense color without affecting buttercream’s consistency. Divide your base buttercream into separate bowls before adding colors for your magical design.
Pro tip: If your buttercream becomes too soft, refrigerate it for 10-15 minutes. If it’s too stiff, warm your mixing bowl slightly or add a teaspoon of milk to soften.
Mastering the Unicorn Cake Color Palette

Creating a magical birthday cake starts with picking the right colors. Your unicorn cake will come to life with a thoughtful color design. The right colors turn a simple dessert into a magical masterpiece that sparks the imagination.
Choosing Complementary Colors
Choosing the perfect color scheme is key for cake decorating. Here are some tips for magical birthday cakes:
- Start with a soft base like pink, lavender, or mint green.
- Choose contrasting colors that really stand out.
- Keep your colors to 3-4 for a balanced look.
Food Coloring Techniques
Getting vibrant yet soft colors needs precision. Experts say gel food coloring is better than liquid for intense colors.
| Color Type | Intensity Level | Best Uses |
| Gel Colors | High | Vibrant unicorn designs |
| Liquid Colors | Low | Subtle color variations |
| Powder Colors | Medium | Metallic and pearl effects |
Creating Pastel Shades
To make dreamy pastel colors, start with white frosting. Add tiny amounts of gel coloring slowly. Mix slowly and incrementally to avoid too much color. A small amount can change your whole buttercream color.
Pro tip: Always test colors on a small sample before committing to the entire cake!
Step-by-Step Assembly Guide for Your Unicorn Cake
Making a stunning unicorn cake needs careful assembly and detail. Your diy unicorn cake journey is at a key point when building the cake. Professional bakers say layering and crumb coating are key for a perfect birthday cake.
Start by getting your cake layers and buttercream ready. Make sure your work area is clean and steady. You need a solid base for your magical unicorn cake.
- Position the first cake layer on a durable cake board
- Apply an even layer of buttercream between each cake layer
- Gently stack layers, checking for level alignment
- Utilize a cake turntable to ensure a smooth and even frosting application
The crumb coat is vital in your unicorn cake tutorial. It’s a thin layer of buttercream that seals in crumbs and makes the surface smooth for decoration.
| Assembly Step | Key Technique | Time Required |
| Layering | Even pressure, centered placement | 10-15 minutes |
| Crumb Coating | Thin, even layer | 15-20 minutes |
| Chilling | Refrigerate between coats | 30 minutes |
Pro tip: Refrigerate your cake between coating layers to achieve a smoother finish. Chilling helps the buttercream set, making decorating easier.
“A flawlessly assembled cake provides the perfect canvas for your imaginative unicorn design.” – Professional Cake Decorator
Your unicorn cake is now ready for its magical transformation into a show-stopping birthday centerpiece!
Crafting the Magical Unicorn Horn and Ears
Making a unicorn cake’s iconic features needs skill and creativity. This unicorn cake tutorial will show you how to make simple fondant into magical decorations. Your dessert will then be truly spectacular.
The key to a great unicorn cake is its horn and ears. These features bring your cake to life, making it a whimsical masterpiece.
Fondant Shaping Techniques
Start with top-notch fondant for the best results. Here’s how to make perfect unicorn details:
- Knead fondant until smooth and pliable
- Roll fondant into a thin, even sheet
- Cut precise triangles for ears
- Create a long, tapered cone for the horn
Adding Metallic Details
Make your fantasy cakes shine with metallic accents. Use edible metallic paint or luster dust to decorate your fondant pieces:
- Select gold or pearl metallic colors
- Apply thin, even layers of edible paint
- Let each layer dry completely
- Gently attach horn and ears to cake
Pro tip: Use a small brush for precise metallic applications, ensuring your unicorn cake looks professionally decorated.
“The beauty lies in the details.” – Cake Decorating Wisdom
With these tips, you’ll make a unicorn cake that will wow at any celebration.
Piping Techniques for the Mane and Decorative Elements
To make a magical unicorn cake, you need to master certain piping techniques. These skills turn a simple cake into a stunning centerpiece for any celebration.
Choosing the right piping tips is key for the cake’s decorations. Look for tips that make different textures and cool visual effects.
- Petal tips (sizes 103-108) for creating flowing mane elements
- Star tips for textured, dimensional decorations
- Round tips for precise detail work
Stunning piping comes from consistent pressure and a steady hand. The buttercream’s temperature also affects the smoothness of your lines.
| Piping Tip | Technique | Best Used For |
| Petal Tip #103 | Ruffled Motion | Mane Texture |
| Star Tip #1M | Swirling Motion | Dimensional Accents |
| Round Tip #2 | Precise Detailing | Fine Lines |
Pro tip: Chill your piping bag between color changes to maintain crisp, clean lines and prevent color bleeding.
“The magic is in the details. Each stroke tells a story.” – Professional Cake Decorator
Practice piping on parchment paper before your unicorn cake. This builds your confidence and skill.
Adding Sparkle and Magic: Final Decorative Touches
Your unicorn cake tutorial is now at its most thrilling part. The final touches turn your dessert into a fantasy-themed cake that will amaze your guests.
Edible Glitter Application Techniques
To add shimmer to your unicorn cake, you need to be precise and creative. Choose high-quality edible glitter that matches your cake’s colors. Various techniques can be used to apply it:
- Dry brushing for a subtle sparkle
- Spray-on glitter for even coverage
- Precise hand-dusting for detailed designs
Strategic Placement of Decorative Elements
To make your fantasy-themed cake stand out, place your decorations wisely. Here are some tips:
| Decorative Element | Recommended Placement | Visual Impact |
| Edible Pearls | Around horn base | Elegant accent |
| Sugar Flowers | Mane edges | Soft romantic touch |
| Metallic Accents | Horn and ear tips | Dramatic highlight |
Remember, less is more when adding the final touches to your unicorn cake. Each decoration should add to the beauty, not take away from it.
“The charm is found in the details.” – Professional Cake Decorator
Your unicorn cake is now ready to enchant everyone. It’s set to be the highlight of any celebration.
Storage and Transportation Tips
Creating a stunning birthday cake decoration needs careful handling after it’s done. Your homemade unicorn cake must get special care during storage and transport. This keeps its magical look for a kids’ birthday party cake celebration.
Cake Storage Essentials
- Refrigerate the cake in a clean, covered container
- Keep away from direct sunlight and heat sources
- Store at consistent temperature between 35-40°F
It’s key to protect the cake’s delicate decorations. Get a strong cake carrier with a secure lid and padding. This helps prevent the cake from moving during transport.
Transportation Strategies
- Chill cake for at least 2 hours before moving
- Use non-slip mats underneath the cake base
- Drive carefully, avoiding sudden stops
| Storage Duration | Recommended Conditions |
| 24 hours | Refrigerator, covered container |
| 48 hours | Airtight cake box, cool environment |
“A cake that’s transported with care becomes the highlight of any celebration!” – Professional Cake Decorator
For multi-tiered unicorn cakes, use structural supports like dowel rods. This helps keep the cake in place during transportation. Gentle handling keeps your birthday cake decoration looking perfect!
Troubleshooting Common Unicorn Cake Issues
Making a diy unicorn cake can be tough, even for pros. But, every tip comes from learning from mistakes. Knowing common problems lets you make a beautiful homemade unicorn cake with ease.
Preventing Fondant Problems
Fondant can be tricky for your unicorn cake design. To avoid issues, follow these key tips:
- Thoroughly knead the fondant to eliminate any air bubbles
- Use cornstarch to stop it from sticking
- Roll fondant to a uniform 1/8-inch thickness
- Work in a cool, dry place
Fixing Buttercream Mistakes
Buttercream problems can mess up your diy unicorn cake’s look. Here’s a quick guide for fixing common buttercream issues:
| Issue | Solution |
| Grainy texture | Make sure sugar dissolves fully, use room temperature butter |
| Too soft | Chill for 15 minutes before piping |
| Air bubbles | Use a paddle attachment, mix slowly |
Your homemade unicorn cake should be magical, not messy. By practicing these tips, you’ll get pro-looking results every time.
Remember: Cake decorating is an art – perfection comes with patience and practice!
Conclusion
Finishing your unicorn cake tutorial is a big deal. It shows you can make magical birthday cakes that everyone loves. You’ve learned to create amazing party centerpieces with a little patience and practice.
Every step in making your unicorn cake has made you more confident in baking and decorating. You’ve mastered making perfect cake layers and adding cool fondant details. These skills will help you make amazing desserts for many celebrations.
Remember, each unicorn cake is special, just like the celebration it’s for. Don’t hesitate to experiment with new colors, textures, and unique details.The most important thing is the joy and love you put into your cake, making it unforgettable for all.
Now you’re ready for more baking adventures. Whether it’s making treats for kids’ birthdays or fancy desserts for big events, you’ve got the basics down. This tutorial has given you a great start for your baking journey.
Link to a Party Planning Guide: Example: Unicorn Party Planning Guide
Link to a Recipe for Homemade Fondant: Example: Homemade Fondant Recipe
FAQ
How difficult is it to make a unicorn cake for a birthday party?
Making a unicorn cake can be a bit challenging, but it’s doable. If you’re good at baking and decorating, you can make a beautiful unicorn cake. Simply follow a step-by-step guide and use the appropriate tools.
What special tools do I need to make a unicorn cake?
You’ll need special tools like piping bags and decorative tips. Also, fondant tools, food coloring gels, and edible glitter are important. Don’t forget basic baking tools like cake pans and an offset spatula.
How early can I prepare a unicorn cake?
Bake the cake layers 1-2 days before. Store them in plastic wrap. Decorate the cake 1-2 days before the party and keep it in the fridge. Add glitter just before serving to keep it looking great.
Can I make a unicorn cake if I’m a beginner baker?
Yes, beginners can make a unicorn cake. Break it down into simple steps. Start with a basic cake, practice your buttercream, and watch videos. Remember, it’s okay if it’s not perfect.
What are the most common mistakes when making a unicorn cake?
Mistakes include uneven buttercream and cake layers. Colors might not be pastel enough, and fondant can be tricky. Also, placing the horn and ears wrong and overworking decorations are common issues. A detailed tutorial can help you avoid these mistakes.
How can I make my unicorn cake suitable for different dietary requirements?
Use gluten-free flour and dairy-free buttercream for different diets. Vegan food coloring is also an option. Many bakers offer these alternatives to make sure everyone can enjoy the cake.
What is the estimated cost of making a DIY unicorn cake?
The cost depends on the ingredients and decorations. A homemade unicorn cake can cost between $30-$75. Quality tools can help you make more cakes in the future.
How long does it typically take to decorate a unicorn cake?
Decorating a unicorn cake takes 2-4 hours for experienced bakers. Beginners might need 4-6 hours. This includes baking, preparing buttercream, and decorating. Breaking it into stages can make it easier.
We hope you enjoyed our Unicorn Birthday Cake Guide: Make a Stunning Party Centerpiece. We’d love to share more fun and exciting recipes like this one:
How to Make the Best Grilled Tuna at Homehttps://ellianarecipes.com/wp-admin/post.php?post=198&action=edit
How to Bake Disney’s Famous Chocolate Chip Cookieshttps://ellianarecipes.com/how-to-bake-disneys-famous-chocolate-chip-cookies/

